Today I would like to share with you my experience upgrading my old Mac (intel chip) Retina 2015 to do it faster and also increase de size from 256 GB to 1TB.
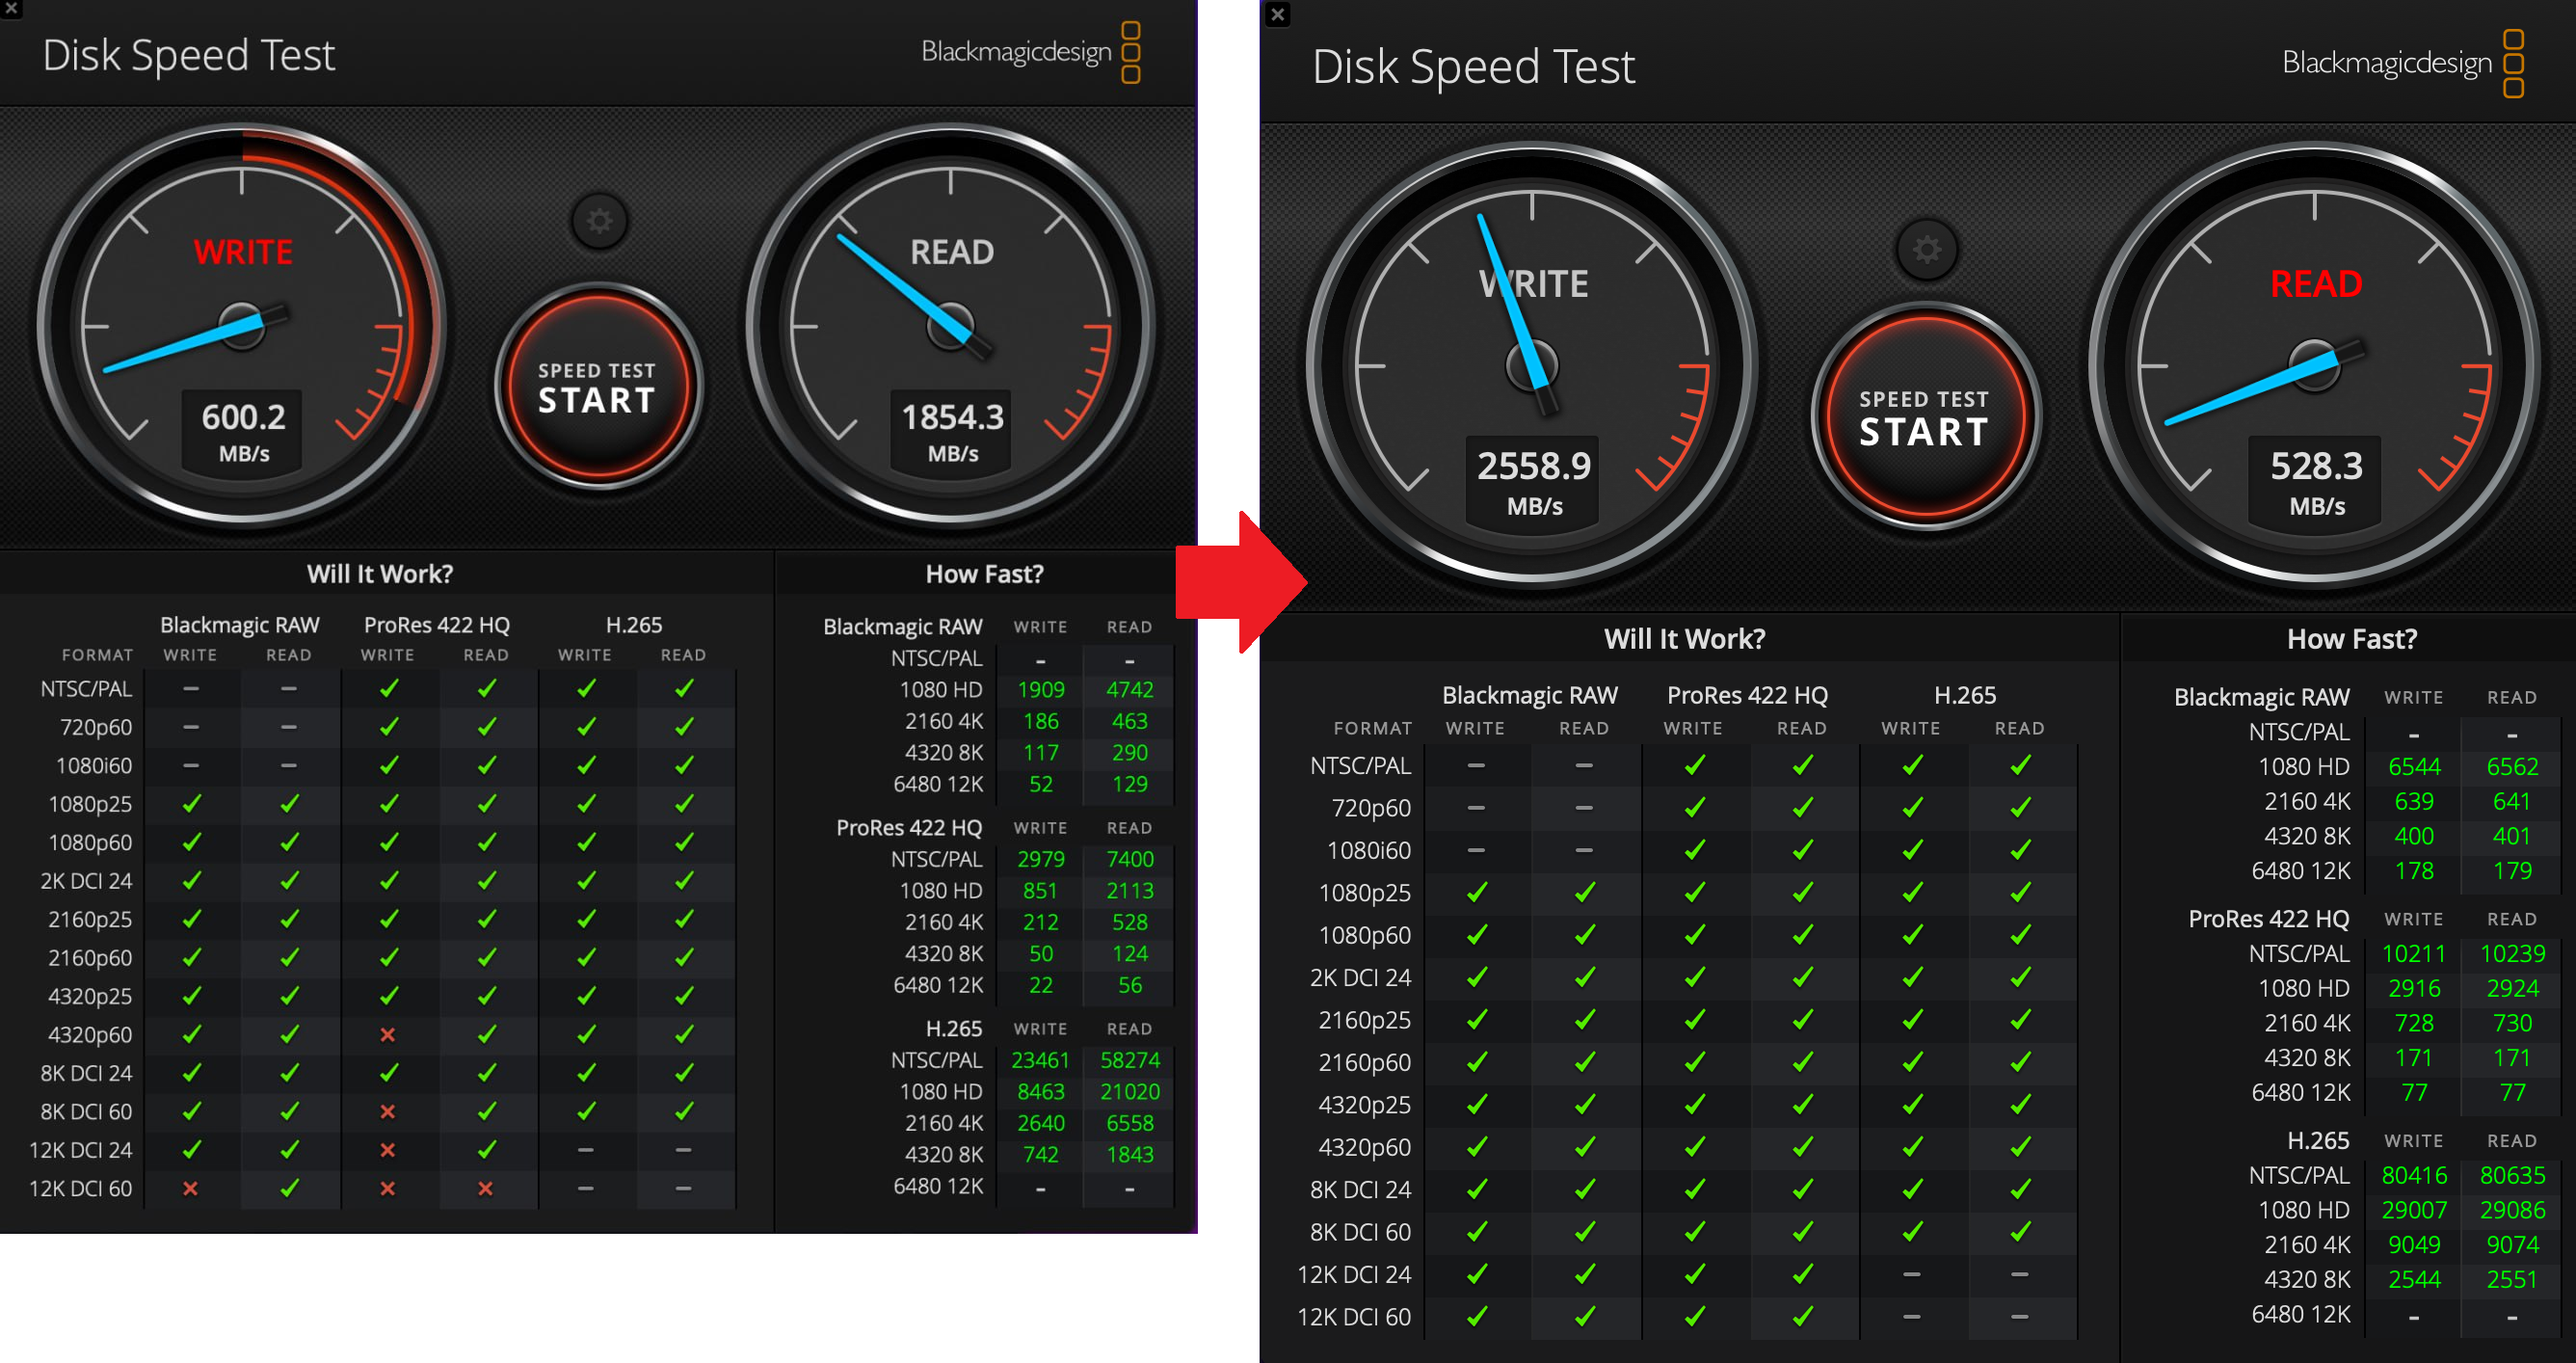
Because the mac memory is soldered to the main board, I only upgrade the disk. But i got a «new» Mac up to 3x faster.
Introduction
If you’re still rocking a 2015 Retina Mac with an Intel chip, you might have noticed a slowdown in performance, especially when handling resource-intensive tasks. Fear not! In this sort of guide, we’ll explore the exciting world of upgrading your trusty Mac with a cutting-edge NVMe M.2 SSD, leveraging the power of PCIe 4.0. This upgrade promises to breathe new life into your «old» Mac, providing faster speeds and improved overall performance.
But here’s the kicker – the speed capabilities of this new SSD might be more than this Mac was originally designed to handle. If I’m not wrong, the 2015 Retina Mac, with its inherent design limitations, tops out at around 3000 in terms of speed. That means, while this new SSD can push the boundaries of PCIe 4.0, the Mac will operate at its maximum designed speed, ensuring a significant performance boost without unnecessary excess. So, you can buy other cheaper models, but be sure in that case this is compatible with your Macs.
Why Upgrade to NVMe M.2 SSD
Traditional hard drives and even some SATA SSDs may struggle to keep up with the demands of modern applications and operating systems. Enter NVMe M.2 SSDs – these compact, lightning-fast drives use PCIe lanes directly on the motherboard, bypassing traditional bottlenecks and significantly boosting data transfer speeds.
Choosing the Right NVMe M.2 SSD
Before diving into the upgrade, it’s crucial to select the right NVMe M.2 SSD for your Mac. Ensure compatibility and consider factors such as storage capacity, read/write speeds, and, of course, PCIe compatibility. Opting for a PCIe 4.0 SSD ensures you unlock the full potential of your upgrade. Again, you can buy other cheaper models, but be sure in that case this is compatible with your Macs. There are many of them.
Step-by-Step Upgrade Process:
1. Backup Your Data: Before embarking on any hardware upgrade, back up your essential data to prevent any potential data loss.
2. Gather Necessary Tools: To perform the upgrade, you’ll need a set of screwdrivers, an anti-static mat or wrist strap:
- Pentalobe Screwdriver 1.2 mm (5-Point) for removing the screws on the bottom panel of your Mac.
- Hexagonal Screwdriver 2mm (for NVMe installation) for remove the old NVMe SSD and install the new one. You can see the above pincture.
- PCIe 4.0 NVMEe M.2 SSD: https://www.amazon.es/dp/B08GS7748F?ref=ppx_yo2ov_dt_b_product_details&th=1
- SSD to NVME converter hard drive adapter card for 2013 2014 2015 Macbook Pro/Macbook Air: https://www.amazon.es/dp/B07PJTFBKL?psc=1&ref=ppx_yo2ov_dt_b_product_details
3. Open Up Your Mac carefully.
4. Locate and Replace the Existing Drive: Identify the current storage drive and replace it with the new NVMe M.2 SSD.

5. Format and Install macOS: Start your Mac using a startup key combination with the new drive-in place.
- Using Disk Utility set a name («Macintosh HD», for example) and format the SSD using APFS and keeping other values as default.
- Reinstall macOS and follow the instructions. Your new MacOS will be installed following easily step by step.
If your Mac doesn’t recognize your new SSD, be sure you are following some additional steps:
- Reset NVRAM: https://support.apple.com/en-us/HT204063.
- If after some try you don’t get it, try again the previous step and if you are not able to get it, take a look to this link: https://support.apple.com/en-us/102611.
- Other startup key combination: https://support.apple.com/en-us/102603#guidelines.
Conclusion
Upgrading your 2015 Retina Mac with an NVMe M.2 SSD is a game-changer, injecting new life into your aging machine.
Embrace the speed, efficiency and the new storage size!
Juanlu
