Introduction: Breathing New Life Into an Aging iMac
A few weeks ago, some friends entrusted me with a mission: revive their late 2013 iMac. Their other option? «Dispose of it.»
I’ll admit, the initial steps were intimidating. The fear of opening it without the right tools, the possibility of damaging something irreplaceable, and the challenge of resealing the screen loomed large. But I decided to take the leap, and this post is the result of that adventure—a journey that turned out to be both entertaining and rewarding.
This guide captures the steps I followed, from upgrading the hardware to fine-tuning the software, ensuring the iMac performs better than ever. Let’s dive in!
Tools and Components You’ll Need
The following hardware and tools were chosen based on the specific requirements and compatibility of the late 2013 iMac. Each component ensures optimal performance while addressing the iMac’s technical constraints.
Hardware
- Primary Storage (NVMe SSD):
- Fanxiang SSD 512GB – M.2 PCIe Gen3x4, up to 3500 MB/s.
- Amazon Link
- Secondary Storage (SATA SSD):
- Silicon Power 1TB SSD – 2.5” SATA III.
- Amazon Link
- RAM Upgrade:
- Timetec 16GB Kit (2x8GB) – DDR4 1600MHz.
- Amazon Link
- Cooling Accessories:
- GLOTRENDS M.2 Heatsink – Designed for M.2 SSDs, it ensures optimal cooling and extends SSD lifespan.
- Amazon Link
- Adhesive Strips:
Additional Tools
- Heat Gun: For softening the screen adhesive.
- iMac Opening Tool: Included in the adhesive strip kit.
- Torx Screwdrivers: Essential for removing screws during disassembly.
Step 1: Preparing Your iMac for Hardware Upgrades
1.1 Opening the iMac

Opening the late 2013 iMac requires patience and precision:
- Use a heat gun to soften the adhesive around the display.
- Employ a screen removal tool to carefully detach the screen, avoiding damage to the fragile display cables.
1.2 Upgrading the RAM
The iMac originally came with 8GB of RAM. I decided to double it to 16GB to enhance multitasking and overall performance.
- Remove the back panel and install two 8GB DDR4 RAM sticks.
- Ensure the modules are firmly seated before reassembling.
1.3 Installing an NVMe SSD
Installing an NVMe SSD requires accessing a specific PCIe slot located behind the logic board. Unlike the SATA connection for the original HDD, this PCIe slot offers significantly faster data transfer speeds.
Steps to Install the NVMe SSD
- Remove the Logic Board:
- Carefully disconnect all cables attached to the logic board, including the display and power connections.
- Unscrew the logic board and gently tilt it forward to access the back.
- Locate the PCIe Slot:
- The NVMe-compatible PCIe slot is positioned on the rear side of the logic board.
- Note: This is not the same slot or adapter used by the original SATA drive.
- Install the NVMe SSD:
- Ensure the SSD is firmly seated in the PCIe slot for optimal connectivity.
- Reassemble the Logic Board:
- Reverse the steps to reconnect all cables and secure the logic board.
1.4 Adding a SATA SSD for Storage
- Replace the original HDD with a 2.5” SATA SSD, connected via the SATA interface.
- Secure it with brackets and cables, then format it using Disk Utility.
Step 2: Setting Up OpenCore for Modern macOS Compatibility
2.1 Why Use OpenCore?
The late 2013 iMac is unsupported for macOS Ventura, but OpenCore allows bypassing these restrictions. This ensures:
- Access to modern macOS features.
- OpenCore patches improved NVMe driver handling on older hardware.
- Improved security and hardware compatibility.
2.2 Creating a Bootable USB Drive
- Download OpenCore configurator and the macOS Ventura installer.
- Format a USB drive as Mac OS Extended (Journaled) with a GUID partition map.
- Configure the EFI partition using the OpenCore configurator and include the required kext files for the 2013 iMac.
2.3 Installing macOS Ventura
- Boot into OpenCore via the USB drive and select the macOS installer.
- Install the OS on the NVMe SSD and follow the on-screen instructions.
3.3 Enable TRIM Support
For SSD longevity, enable TRIM support by running the command:
sudo trimforce enableStep 3: Resetting SMC and PRAM/NVRAM: A Crucial Step After Upgrading
Once you’ve completed the hardware upgrades and macOS installation, it’s important to reset the SMC (System Management Controller) and PRAM/NVRAM (Parameter RAM/Non-Volatile RAM). These resets ensure that your iMac recognizes the new hardware properly and operates optimally.
Why Reset the SMC?
The SMC manages low-level hardware functions such as:
- Power and thermal management.
- Battery and fan behavior.
- System performance during startup and wake/sleep cycles.
Steps to Reset the SMC on an iMac (Non-T2 Chip):
- Shut down the iMac completely.
- Disconnect the power cord and wait for 15 seconds.
- Reconnect the power cord and wait for an additional 5 seconds.
- Press the Power button to turn on the iMac.
Why Reset PRAM/NVRAM?
The PRAM/NVRAM stores essential settings such as:
- Startup disk selection.
- Screen resolution.
- Sound volume and time zone settings.
Steps to Reset PRAM/NVRAM:
- Shut down the iMac.
- Turn it back on and immediately press and hold Option (⌥) + Command (⌘) + P + R.
- Keep holding the keys for about 20 seconds or until you hear the startup sound twice (or see the Apple logo appear and disappear twice).
- Release the keys and allow the iMac to boot normally.
Step 4: Fine-Tuning Performance with Macs Fan Control
If, after resetting the SMC and PRAM/NVRAM, your iMac’s fans are still running at high or maximum speed, proceed with this section. Otherwise, you may skip it if the fans behave normally.
3.1 Why Macs Fan Control is Essential
After replacing the original HDD, the iMac’s thermal sensors may misread temperatures, causing the fans to run at full speed unnecessarily.
3.2 How to Fix It
- Install Macs Fan Control to manually set fan speeds or link them to reliable sensors (e.g., CPU proximity).
- Monitor system temperatures to ensure safe operation while maintaining a quiet system.
Conclusion: A Fun and Rewarding Journey
Reviving this late 2013 iMac was a fantastic experience. By upgrading the RAM to 16GB, installing a high-speed NVMe SSD, and adding a 1TB SATA SSD for storage, the iMac’s performance has improved dramatically.
The addition of OpenCore unlocked access to macOS Ventura, extending the device’s lifespan. While Macs Fan Control resolved fan noise issues, every step of this project was a rewarding challenge.
If you’re considering a similar upgrade, go for it! The results are absolutely worth the effort, and the process is as fulfilling as the performance boost itself.
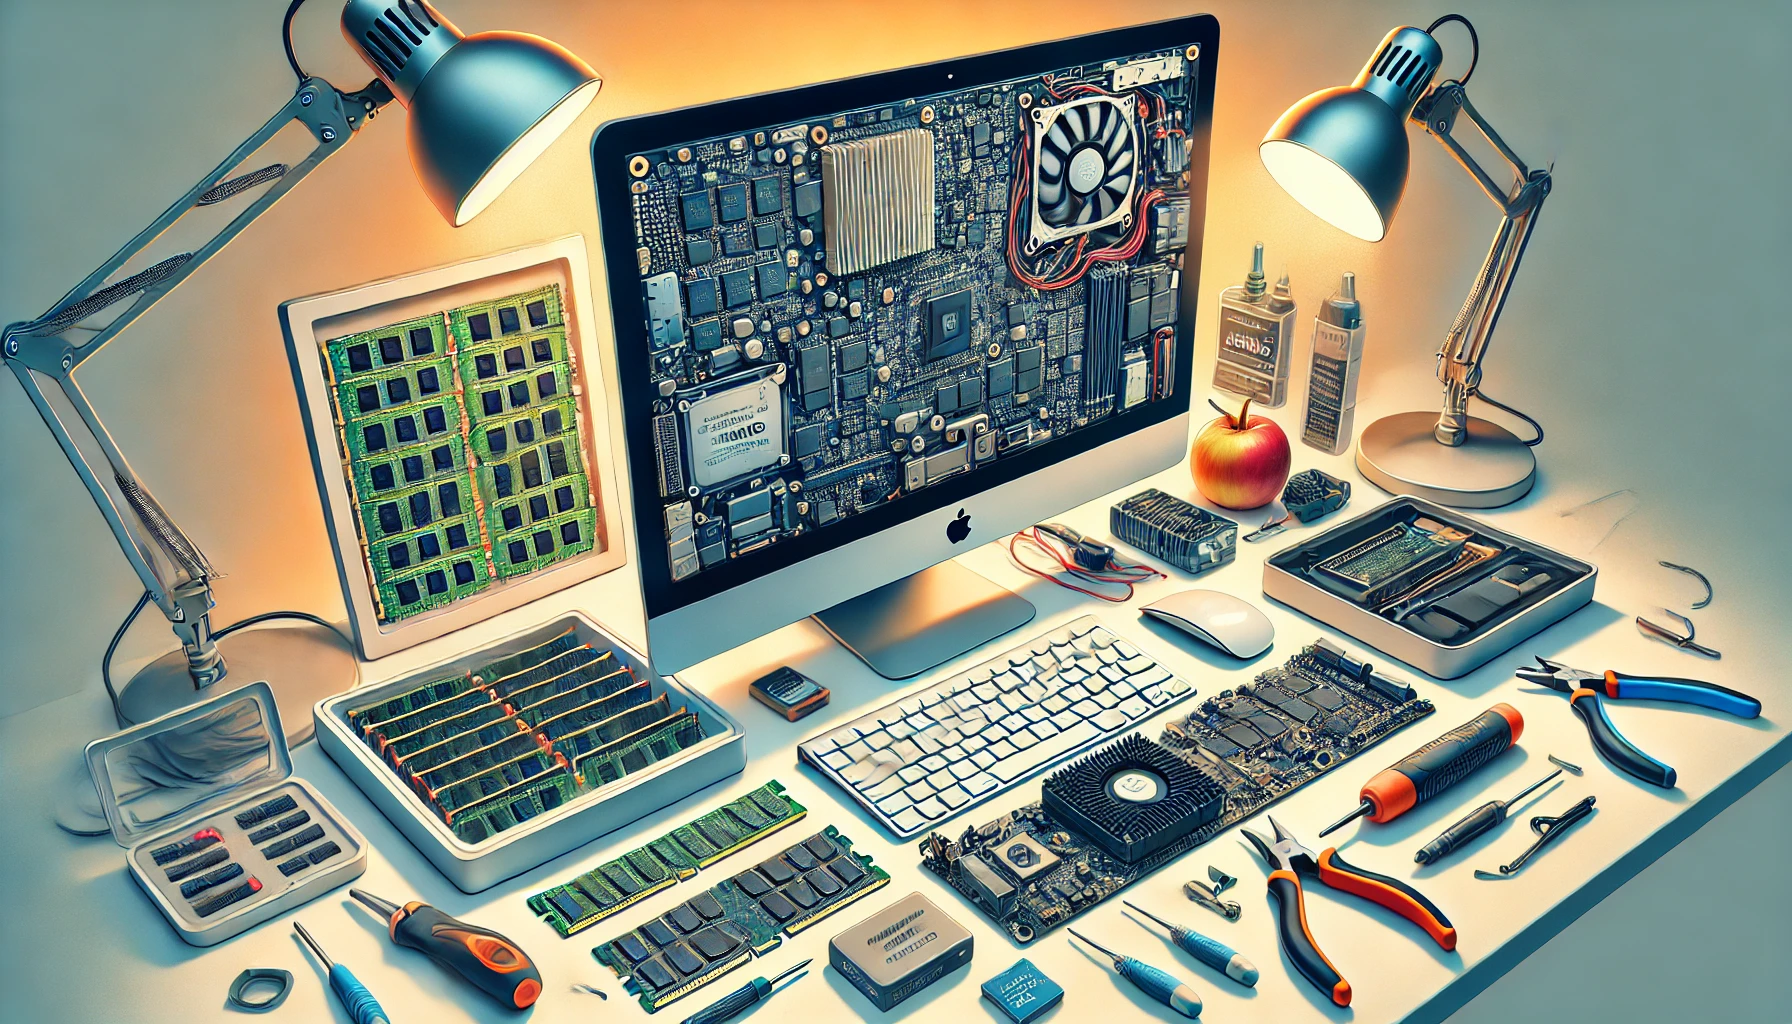
Here the final reassembly step!

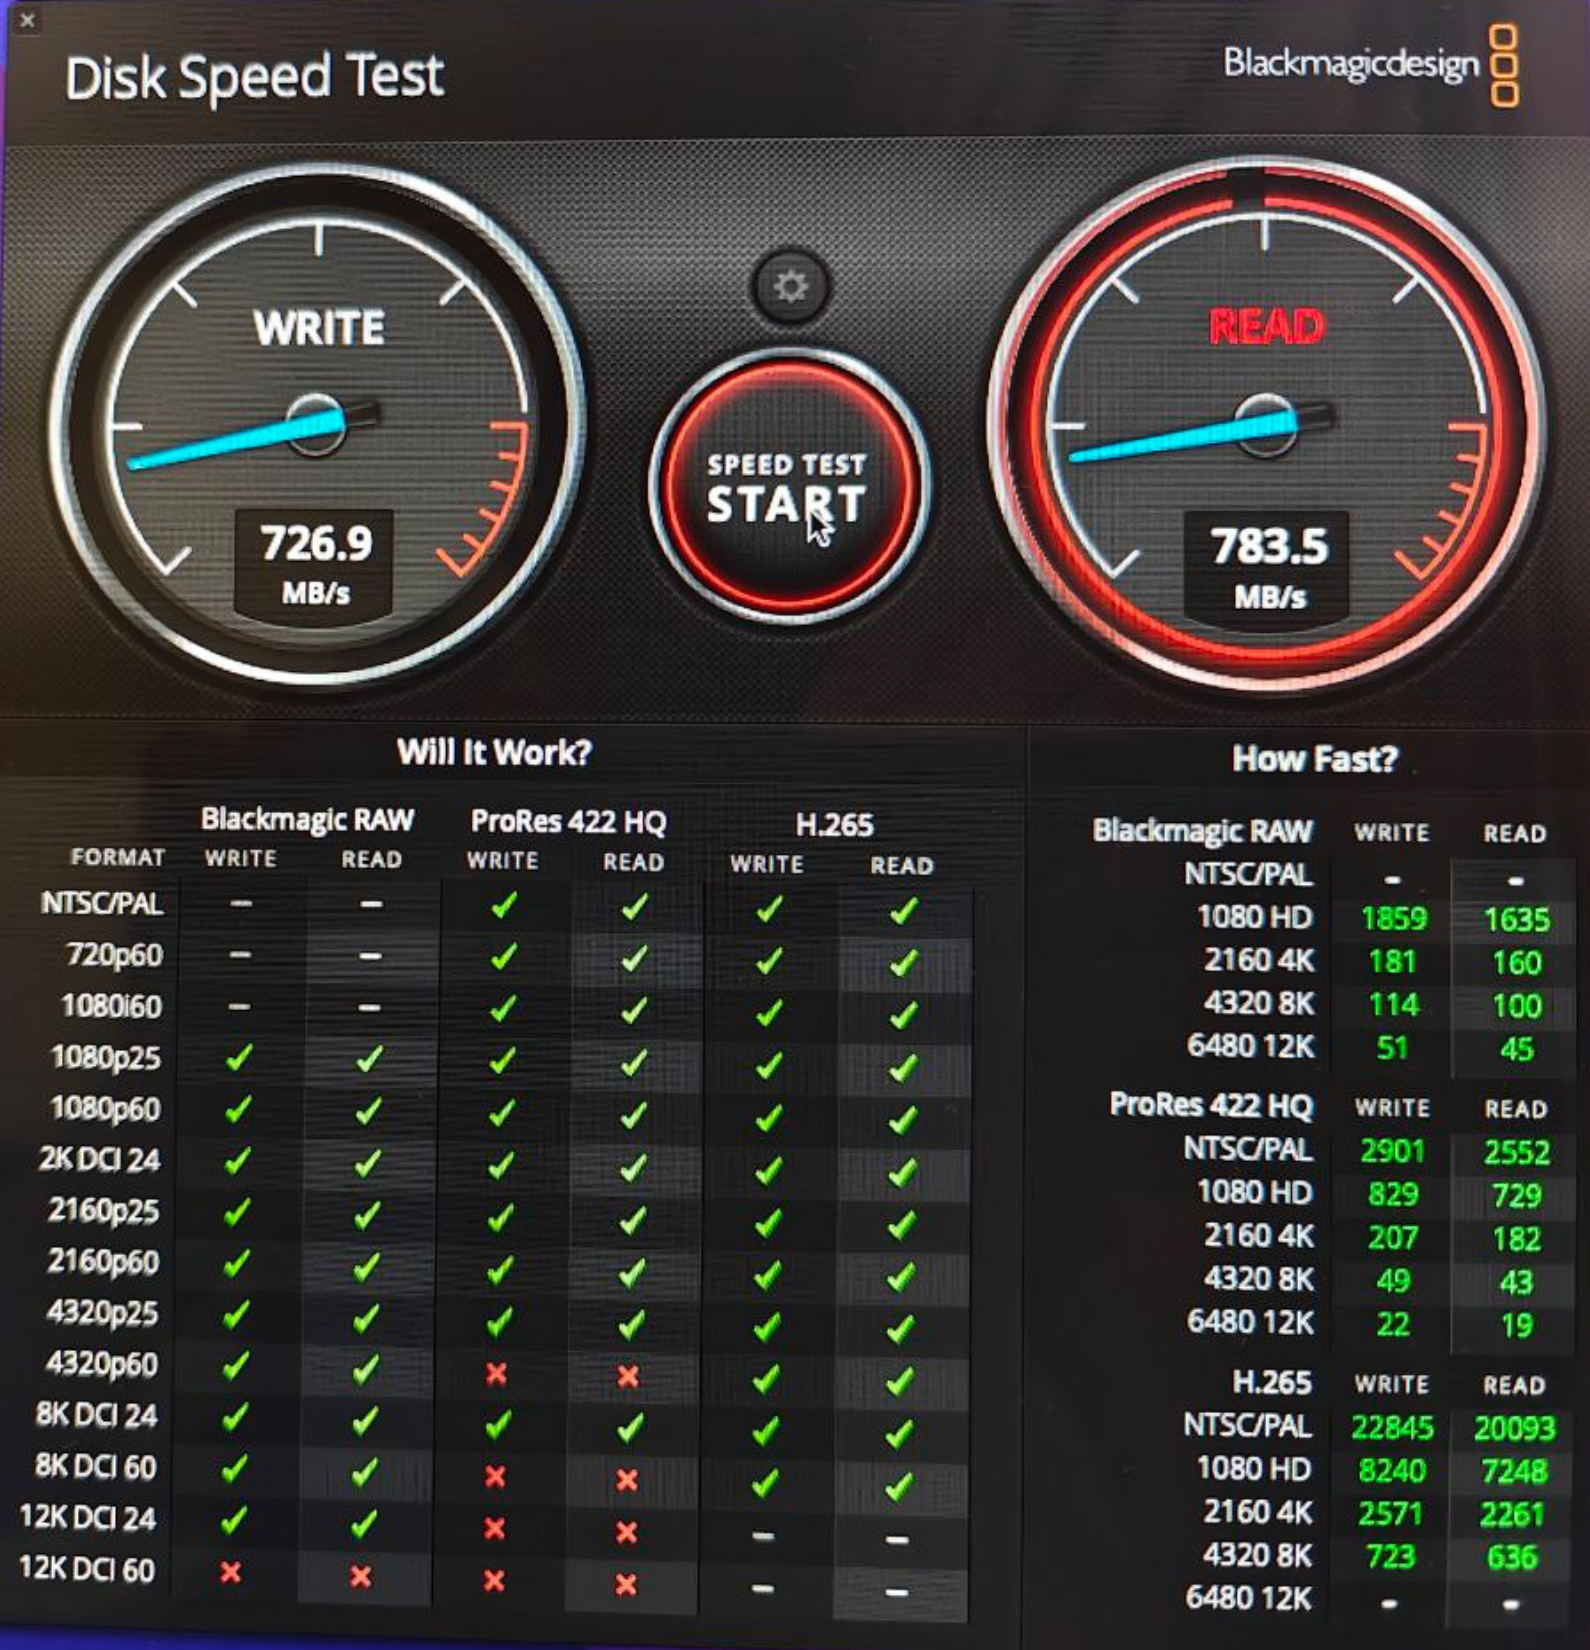
And the result of the NVMe SSD.
Due to hardware limitations, this is the maximum speed I have achieved (750MB/s) for the NVMe SSD disk. Much more than the initial 250MBs with the SATA. I can assure you that with this SSD and the 16GB of RAM the iMac has completely revived.
I hope this help. Enjoy your new iMac !
