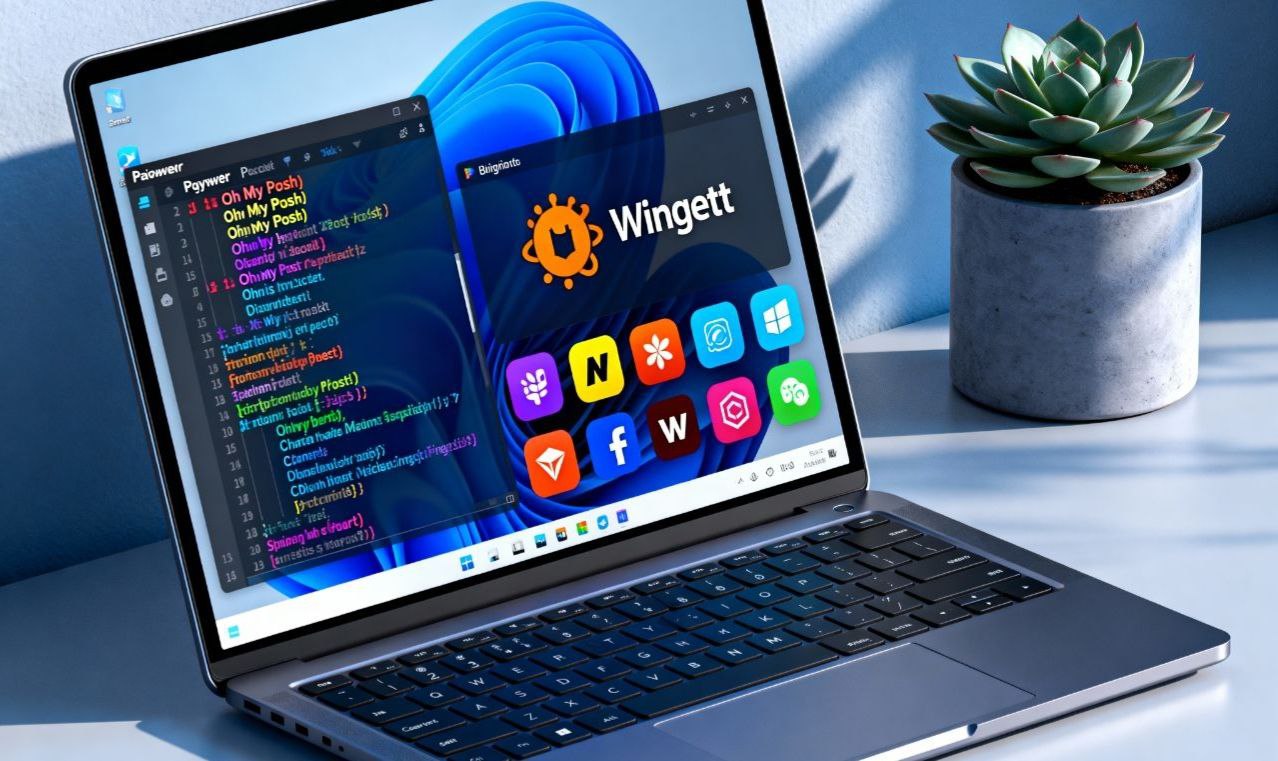
Last week I received my new Yoga Pro 9 16IAH10 – Type 83L0 (specs here), and of course… installing everything manually wasn’t an option 😅. So, I automated the entire process — from Windows setup to terminal styling — using PowerShell and a few carefully crafted scripts.
🇪🇸 Spanish Summary / 🇬🇧 English Summary
🇪🇸 La semana pasada recibí mi nuevo Lenovo Yoga Pro 9 y, como era de esperar, no podía instalar todo manualmente 😅. Así que automatizé completamente el proceso con PowerShell: activación de características de Windows, instalación de aplicaciones con Winget, configuración de WSL y personalización de la terminal con Oh My Posh.
🇬🇧 Last week I got my new Lenovo Yoga Pro 9 and, naturally, manual setup wasn’t an option 😅. I automated everything — Windows features, app installs via Winget, WSL setup, and terminal customization with Oh My Posh.
🧭 Prerequisites
Before running anything, open PowerShell as Administrator and allow script execution:
Set-ExecutionPolicy -ScopeProcess -ExecutionPolicyBypass -ForceYou’ll also need:
- Windows 11 (Pro recommended)
- PowerShell 7+
- Internet connection
wingetpackage manager installed- WSL 2 enabled (optional)
🚀 Step 1️⃣ – Environment Pre-check
Start by verifying your environment with, .\setup.PreCheck.ps1 to validate:
- 👩💻 Admin privileges
- 🗂️ Presence of required setup files
- 📦 Winget availability
- ⚙️ Windows features (WSL, Virtualization, Containers, Hyper-V)
If any warning appears, fix it before continuing.
This ensures your setup runs smoothly and without partial installations.
🧰 Step 2️⃣ – Main Setup (Windows Automation)
Run the main script, .\setup.ps1 to:
✅ Enable key Windows features (Containers, WSL, Hyper-V)
✅ Install apps from apps.json using Winget. You can also use your own apps vía winget export in you current environment before move to the new one!
✅ Install and configure Oh My Posh for PowerShell
✅ Copy your Windows Terminal settings and background images
✅ Set up your PowerShell profile with auto-loading prompt themes
✅ Prepare WSL Ubuntu 24.04, including terminal profile integration
🔍 Step 3️⃣ – Post-Install Validation
After installation, run .\setup.PostCheck.ps1 witch confirms:
- Windows features are enabled ✅
- All apps are installed 🧩
- Oh My Posh + Terminal are properly configured 🖥️
🐧 Step 4️⃣ – Configure Oh My Posh inside WSL
Once Windows setup is complete, let’s mirror the same prompt in WSL Ubuntu.
Open Ubuntu (24.04) from Windows Terminal and execute:
bash /mnt/d/Software/setup/setup-omp.shThis script:
- Installs Oh My Posh in
/usr/local/bin - Copies your theme (
my.omp.json) to~/.poshthemes - Adds initialization to
.bashrcor.zshrc - Reloads your shell automatically 🎨
Result: identical prompt in both PowerShell and Ubuntu shells.

🧩 Folder Structure
D:\Software\setup\
│
├── apps.json
├── my.omp.json
├── setup.ps1
├── setup.PreCheck.ps1
├── setup.PostCheck.ps1
├── setup-Tests.ps1
├── setup-omp.sh
│
├── windows-terminal.settings.json
├── WindowsTerminal-Powershell.png
├── WindowsTerminal-Ubuntu.png
└── README.md
💡 PowerShell Customization Like a Pro
After the base setup is running, it’s time to make the console shine 😎.
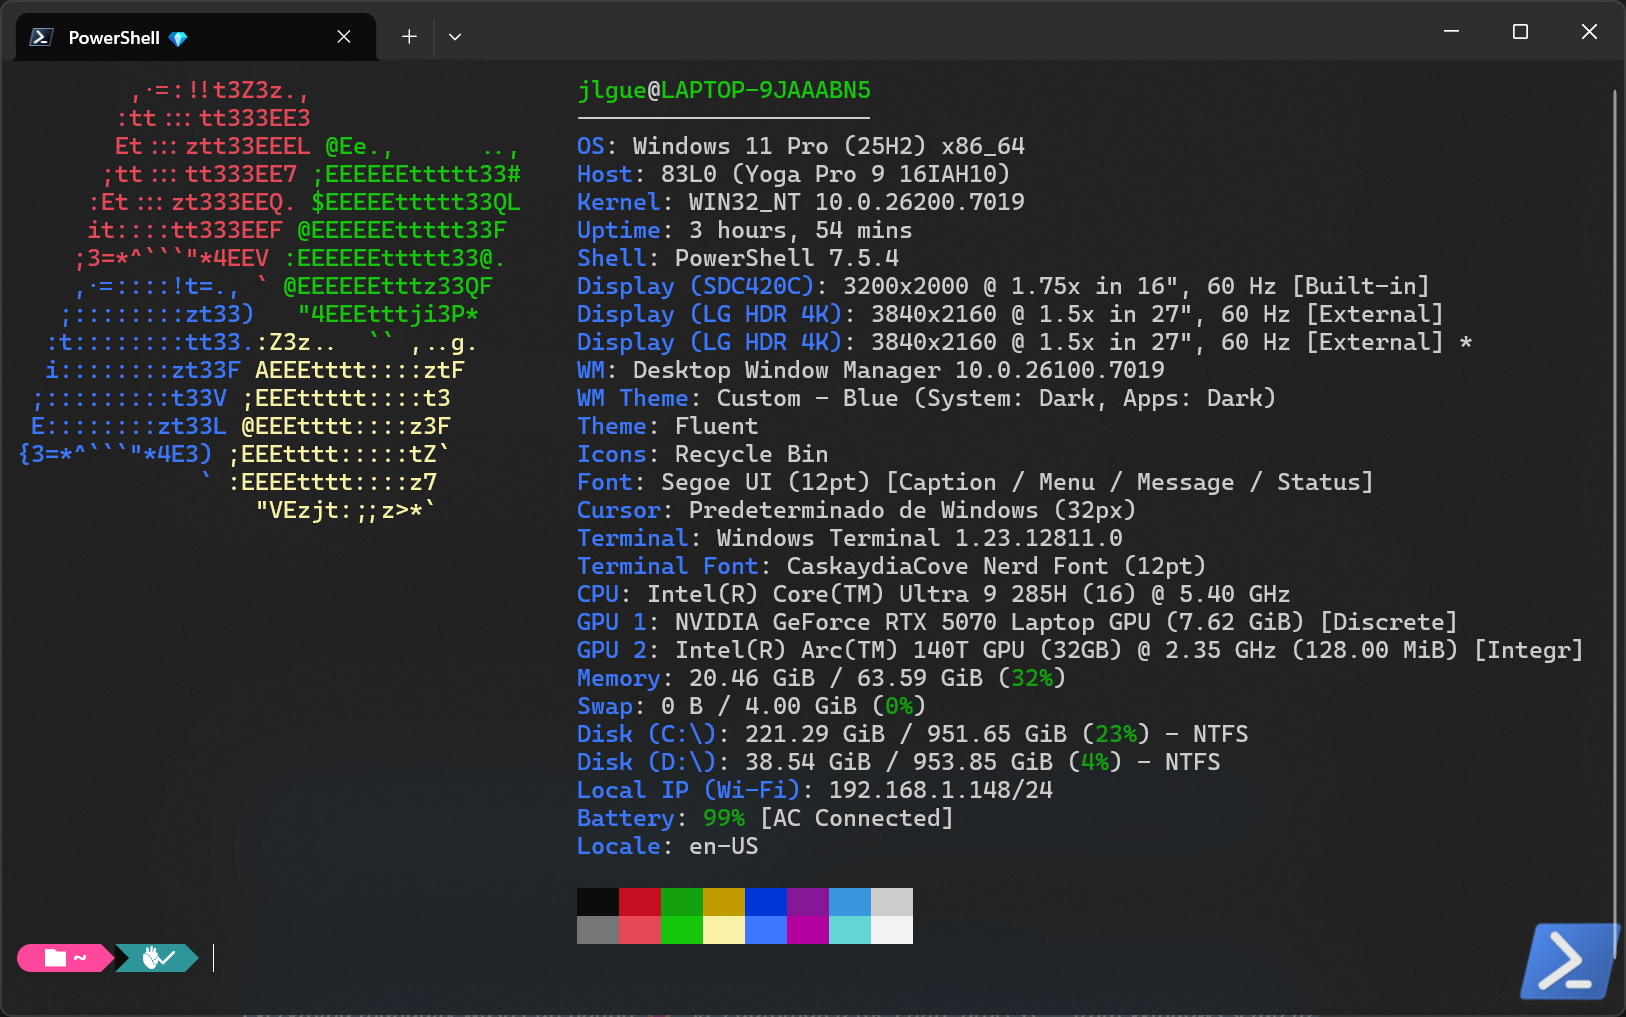
⚙️ Oh My Posh + PSReadLine + Fastfetch
My PowerShell opens with a modern, colorful prompt, smart autocompletion, and a quick system summary.
Install Fastfetch with:
winget install fastfetchThen configure your $PROFILE like this:
# -----------------------------------------------
# 🎨  OH MY POSH (Prompt Theme)
# -----------------------------------------------
oh-my-posh init pwsh --config "D:\Documents\my.omp.json" | Invoke-Expression

# -----------------------------------------------
# ⚙️  PSREADLINE (IntelliSense + Colors)
# -----------------------------------------------
Import-Module PSReadLine

Set-PSReadLineOption -EditMode Windows
Set-PSReadLineOption -PredictionSource HistoryAndPlugin
Set-PSReadLineOption -PredictionViewStyle ListView
Set-PSReadLineOption -HistorySaveStyle SaveIncrementally

Set-PSReadLineOption -Colors @{
    Command                  = "`e[93m"
    Parameter                = "`e[92m"
    String                   = "`e[33m"
    InlinePrediction          = "`e[90m"
    ListPrediction            = "`e[36m"
    ListPredictionSelected    = "`e[96;7m"
}

# Keybindings
Set-PSReadLineKeyHandler -Chord "Ctrl+Spacebar" -Function MenuComplete
Set-PSReadLineKeyHandler -Chord "F2" -Function SwitchPredictionView
Set-PSReadLineKeyHandler -Chord "Alt+RightArrow" -Function AcceptSuggestion
Set-PSReadLineKeyHandler -Chord "Ctrl+Shift+R" -Function ClearHistory

# -----------------------------------------------
# ⚡ FASTFETCH (System Info on Startup)
# -----------------------------------------------
#To avoid Fastfetch running inside non-interactive terminals (like VS Code tasks):
if ($Host.Name -eq 'ConsoleHost' -and -not ($env:TERM_PROGRAM -eq 'vscode')) {
    fastfetch --logo windows
}
# -----------------------------------------------
# ✅  END OF PROFILE
# -----------------------------------------------
The result:
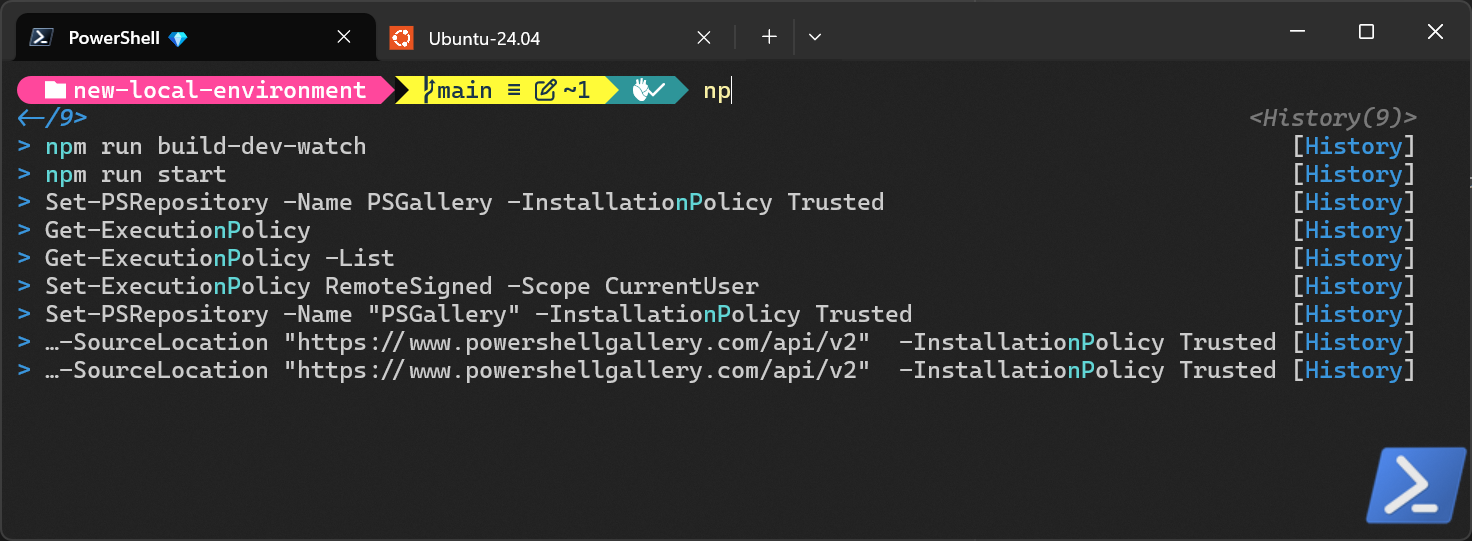
The Intellisense works like this. If you write, for example «np»:
🐧 Step 5️⃣ – Customize WSL Shell (Bash or Zsh)
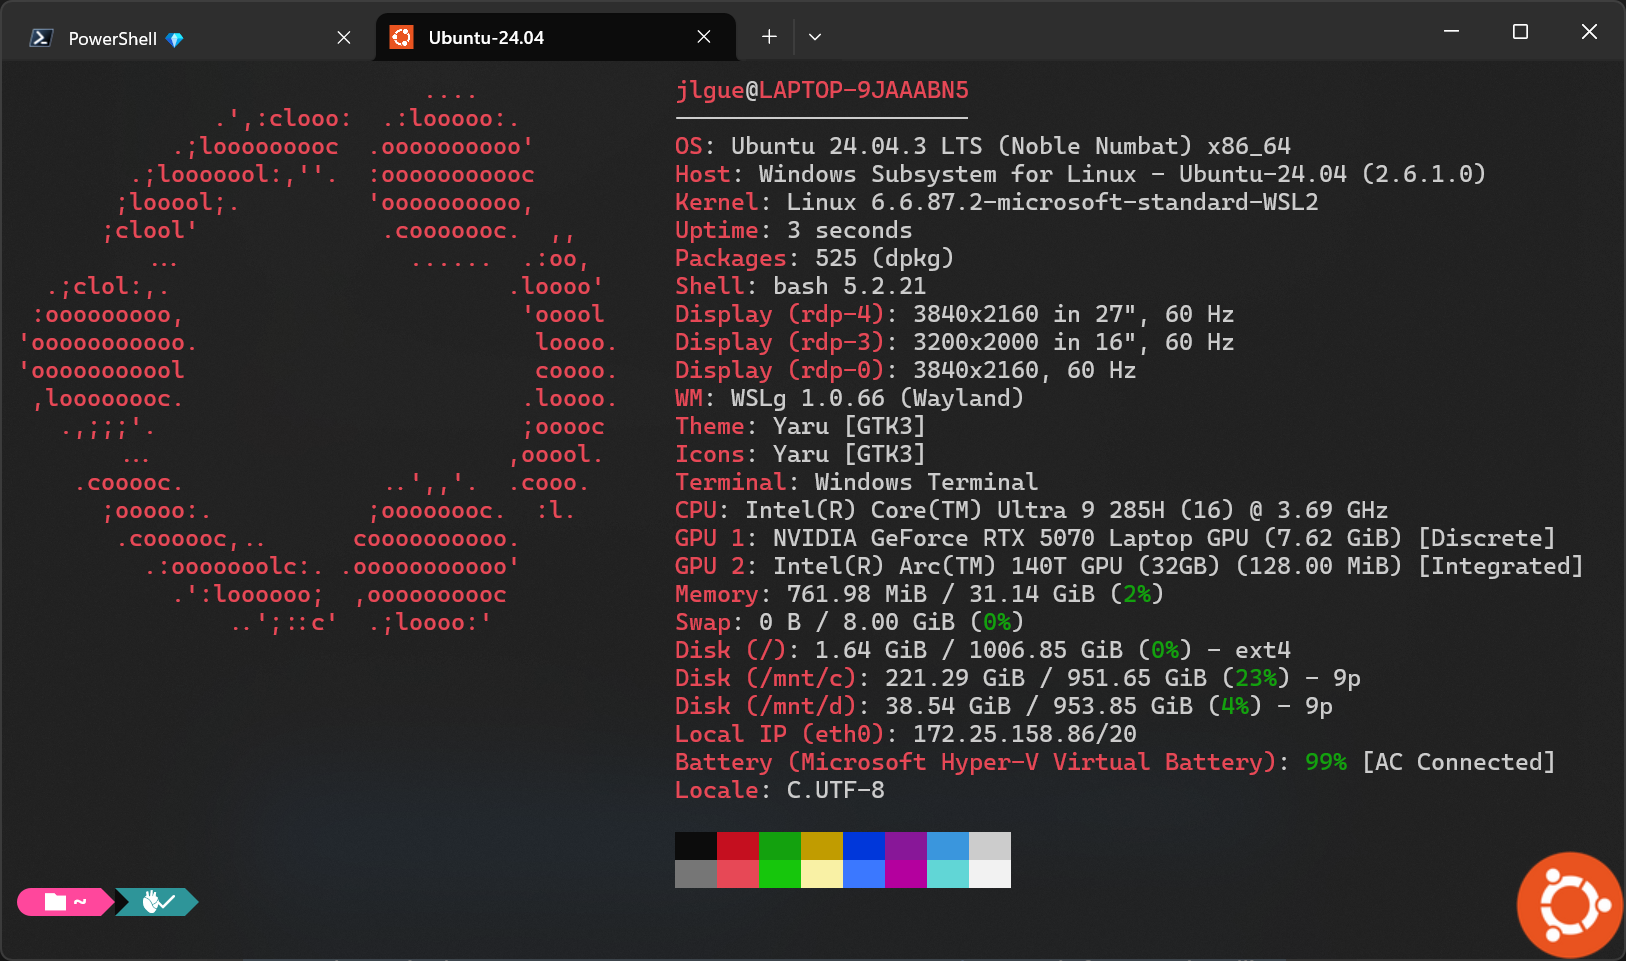
The setup-omp.sh script already installs and configures Oh My Posh automatically.
Here we’ll add Fastfetch and optional tweaks to make your Linux terminal match your PowerShell style.
⚡ Install Fastfetch
sudo apt install fastfetch -yAppend to .bashrc or .zshrc so it runs only in interactive sessions:
if [ -t1 ]; then
   fastfetch --logo ubuntu
fi
💡 You can change the logo (ubuntu, debian, arch, etc.) depending on your distro.
🎨 Activate or Adjust Theme (Optional)
The setup-omp.sh script already activates the theme automatically.
If you ever need to re-apply or customize it manually, run:
Bash
eval "$(oh-my-posh init bash --config ~/.poshthemes/my.omp.json)"Zsh
eval "$(oh-my-posh init zsh --config ~/.poshthemes/my.omp.json)"💡 You can duplicate and modify the theme (e.g.
custom.omp.json) to experiment with colors or segments.
🌀 Optional – Switch to Zsh for better autocompletion
sudo apt install zsh-y
chsh -s $(which zsh)
Now both PowerShell and WSL share the same elegant prompt 💫, with Fastfetch providing a quick system overview every time you open your terminal.
Here is how the WSL (ubuntu) looks like:
🧱 Step 6️⃣ – Post-Installation Tasks
🗄️ DBeaver Projects
Export → Import your projects via File → Export → General → Archive File.
🧩 SQL Server Databases
Backup .bak → Restore on new machine via SSMS.
🐳 Docker Volumes
Backup your docker volumens and then recreate your docker compose (i.e.: docker-compose.yaml) services using:
docker compose -p <YOUR PROJECT NAME> up -d🧠 Troubleshooting
| Issue | Solution |
|---|---|
ExecutionPolicy error | Run Set-ExecutionPolicy -Scope Process -ExecutionPolicy Bypass -Force |
| WSL not found | Enable: Microsoft-Windows-Subsystem-Linux and VirtualMachinePlatform |
| Ubuntu not detected | Run wsl --install -d Ubuntu-24.04 |
| Prompt shows CONFIG ERROR | Verify my.omp.json exists and is valid |
| Ubuntu prompt not themed | Re-run setup-omp.sh inside WSL |
🧩 All Code and Scripts
All scripts are available on my GitHub repository:
👉 https://github.com/juanluelguerre/new-local-environment
🏁 Conclusion
This setup turns a brand-new laptop into a fully-equipped development machine in minutes.
No manual installs, no clutter — just PowerShell automation, unified prompts, and a consistent developer experience across Windows and WSL.
✅ Fast, repeatable, and visually delightful.
Because great tools deserve a great terminal.
